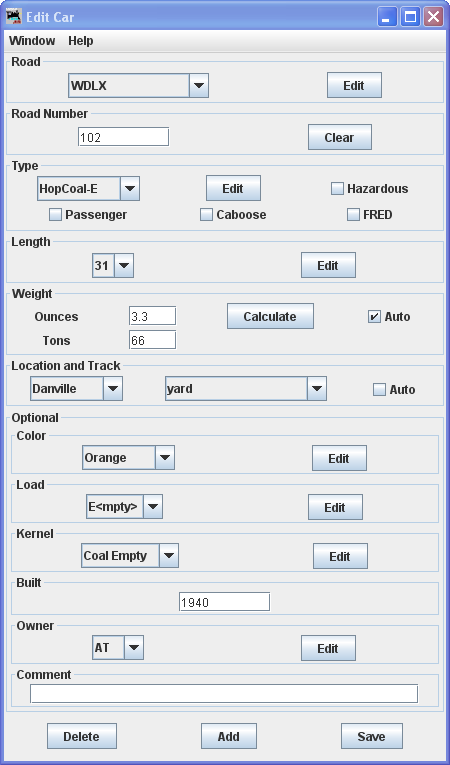
The Add Car window or Edit Car window is opened. Both windows share the same features except for their title.
 
|
Menu Window-- Same as other JMRI menus Help -- Same as other JMRI Menus |

|
Select Road If your Road is not listed then press and the Edit Car Road dialog box will display. Check this reference for the Railroad Reporting Marks. |

|
Enter the car's Road Number The program requires a unique Road Name and Road Number for each car. If you have cars with identical roads and numbers, simply add "-1", "-2", etc. to each of the car numbers. The program when printing out the Manifest or Switch List will drop the -1, -2, etc. from the car's Road Number. |
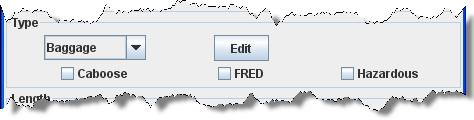 If the car is a Caboose, has a FRED (Flashing Rear End Device), or is Hazardous, check the proper box. The program uses the Caboose and FRED functions to place the car at the end of a train when the train requires a caboose or car with FRED. The Hazardous checkbox will cause the program to add a note to the switch list that the car is transporting hazardous materials. Your railroad's policy regarding hazardous materials can than be applied to this car! |
Type from drop-down list. if your type is not listed then press and the Edit Car Type dialog box will display. The program supports the ability to add a subType to your car types. Adding a "-subType" to your car type will create a new type of car. The "-subType" is not printed on the Manifest or Switch Lists. For example you might have coal cars with loads and coal cars that are empty. If you enter the car type as HopCoal-C for your cars loaded with coal, and HopCoal-E for the empties, the program can use this information to assign and deliver Cars to their appropriate Trains and Locations respectively. |
|
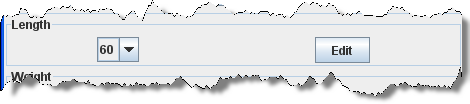
Select the Car's Length If the appropriate Length is not listed then press and the Edit Car Length dialog box will display. |
|
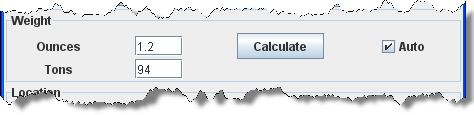
The Car Weight is automatically calculated when the Auto is selected based on the car's length, but you can enter a different weight if necessary. If the Auto is not checked then you may use the button to calculate the weight. When entering the length of a car, enter the length of the body and not the total length. For example, a forty foot boxcar has a length of 40 feet. The program when calculating lengths will add two feet to each end of a car for the couplers. Therefore when you place a forty foot car at a siding, it will consume 44 feet of track. |
|
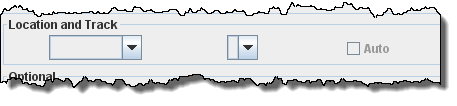
Now you select the car's Location and Track . The first selection is the Location, city, yard etc. that was created under Locations. The second selection is based on the first and only has entries if there is more than one track at this Location. If the car is off the layout, set the location to None (blank space) Auto selection |
Optional Car Attributes |
|

|
Select the car's Color if the applicable Car Color is not listed then press and the Edit Color dialog box will display. |
|
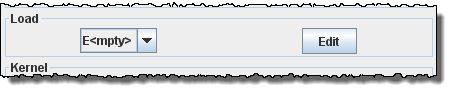
You can optionally set the Load state of the car. Select E for Empty or L for loaded. Press to create your own Car Load codes, but beware there are restrictions. Only sidings with Schedules can load or unload Cars with custom Load types that you've created. It is also suggested that you use a format similar to L(commodity) to describe your Loads. For example a load of tools could be entered as L(Tools). |

|
Kernel If you wish this Car to be part of a Kernel, which is a group of Cars that you want to switch as one unit, select Kernel from drop-down list. If the Kernel you want is not there, press and enter a Kernel name. to add to the list. Then select the Kernel from the drop-down list. |

|
Optional Built you may enter the built date. |

|
You may optionally select an Owner or press to enter an Owner. Then select the Owner from the menu box. |
|
Comment for this car. |

|
add another car.
to store the Cars' settings. The program will create a file (OperationsCarRoster.xml) in your JMRI directory in a folder called "operations". A backup file with the last settings for all of your Cars is also created each time the button is pressed. |
Now lets add several cars to our Car Roster. When we add and save the Cars, they will be added to the Roster and shown in the Cars window.
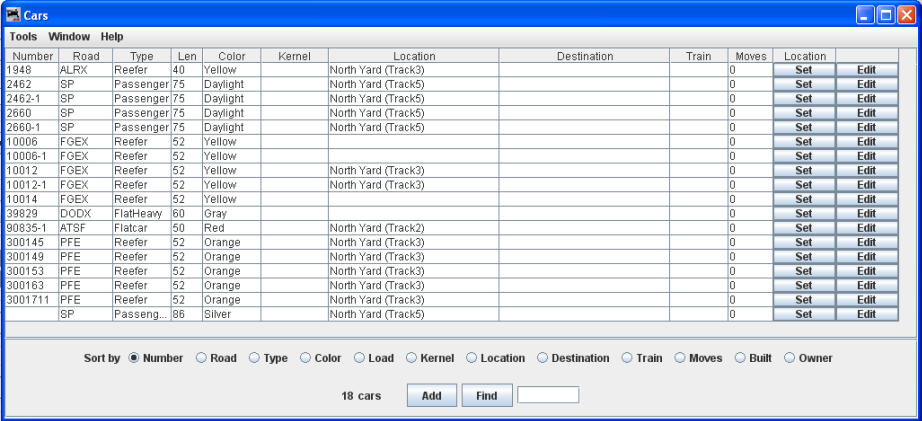
Now if you desire to change a value of a Cars attributes that is already in the Cars Roster, press the button to the right of that Car. The Edit Carwindow will open, which is almost identical to the Add Car window.
You may choose from:
button removes the selected Car from the Roster.
adds the edited Car as another item to the Car Roster.
makes changes and saves them in the Car Roster.
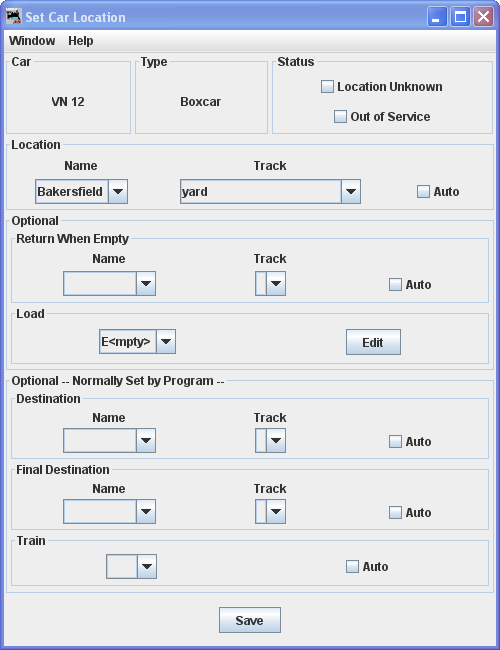
The button when pressed, opens the Set Car Location pane and allows you to override the program and set a Car at a Location that is defined in your OperationsPro database.
|
Menu is standard for JMRI®. Car displays the user name of the selected Car. Location Optional Return When Empty Load Optional (the values in this box are normally set by OperationsPro) Destination optionally set the Name of location and the Track . Auto Final Destination Train press to save the Car Locations that you have set. Close the window when completed. |
Now that you have your Cars stored in the Roster, you will probably want to add some Locomotives to move your Cars about the layout.