Ubuntu (Linux/GNU) is based on Debian and is recognized as being
a very user-friendly distribution.
It's free and it's also suitable for loading onto older machines
which may no longer have a viable commercial OS. It is also far less
resource hungry than current Windows distributions and this is particularly
true of Xubuntu and Lubuntu.
This short instruction deals with installing JMRI on a Ubuntu (or similar Debian based) desktop.
Using JMRI requires a combination of hardware (in this case running Linux), Java software and a JMRI download for a specific version.
JMRI® version 4.2 requires Java 1.8.
You'll need the correct serial port or USB port to attach to your layout hardware. JMRI is compatible with USB-to-Serial adapters, so long as they have Linux drivers that make them look like regular serial ports.
See if you have a version of Java already installed:
sh> java -version
If the Java version is 1.8 or later, you may be fine, but be aware that if you did not install Java on your system yourself,
some systems have Java only partially installed. They will respond correctly to the above command, but still are not complete.
If your system does not have Java in the environment variable PATH, the install is probably not complete.
Check with the system manager or do a fresh Java installation anyway.
If your version is not at least 1.8, or if you get a "java: not found" error, you will need to install it.
Most Linux distributions can get an automated install download
from Oracle by clicking on this button:
![]()
You arrive at a page like this one:
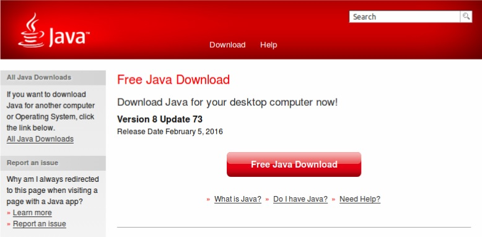
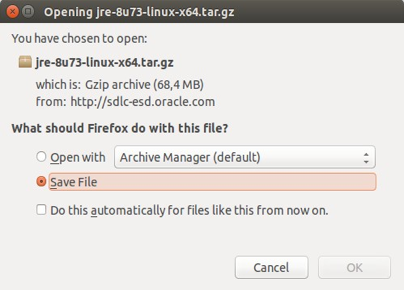
Next you download the Java software package that suits your computer and operating system.
When the download finishes, you will be asked where to store the Java install archive:
If that doesn't work, or you need to manually install Java, you can find further information on the Oracle Java downloads page.
  chmod 666 /dev/ttyS0
  chmod 666 /dev/ttyS1
Just to be safe, before installing a new version of JMRI, rename your existing JMRI folder to "JMRI-1":

Download a version of JMRI, either the
latest production version, or a "test version".

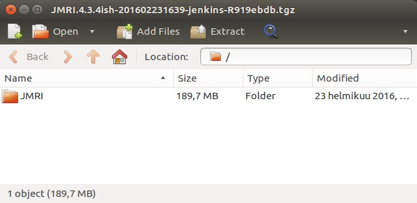
Uncompress/untar the file you just downloaded. This will create a new "JMRI" folder, so you should copy/move the installation file to the Home folder to create the JMRI folder there.
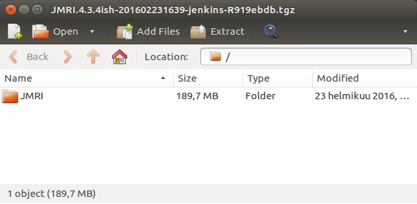
Note: Each JMRI release is an independent set of files: It's intended to be used as a whole. Each release provides new files, and sometimes removes old files.
You should therefore not expand the download into the same place as an existing JMRI installation. Instead, expand it into a separate location, and move in to it's final destination, completely replacing any previous version of JMRI.
To complete the install, just move that new JMRI folder to where you want it on your computer.
You may have special icons or other files that you want to copy from the previous JMRI-1 folder now to the new installation.
Copy them from the JMRI-1/resources folder.
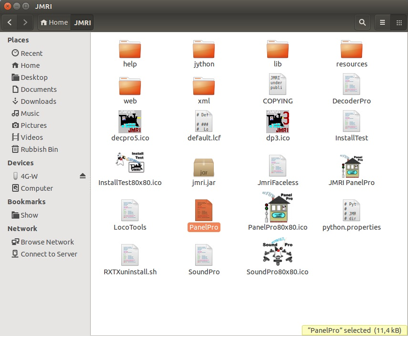
Next we make a start-up launcher icon from the PanelPro script.
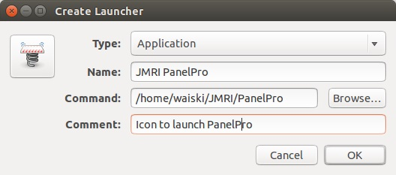
With the mouse middle button you launch the Create Launcher, give it a name, browse to the Command file and add an informative Comment.
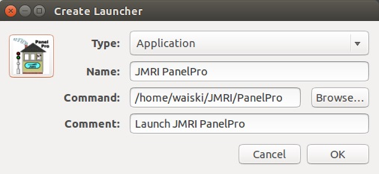
To give your launcher an icon too, click the launching spring and pick up an icon from the resources folder (normally stored in the main JMRI folder).
Now your PanelPro as well as the other JMRI SoundPro, Throttles, DecoderPro etc. launchers look like the one below:
Installation is complete.
You can run the program by using the "DecoderPro", "PanelPro", or "JmriDemo" scripts in the JMRI folder. Change directory there, and invoke a script by typing e.g. "./DecoderPro" in Terminal.
If you are updating from a JMRI version prior to 2.9.2 then Java needs to me "unmodified".
RxTx used to be a problem requiring modifications to Java to enable JMRI to run. Since JMRI version 3 this is no longer required. However, if you are using a version of JMRI prior to 2.9.2 then Java must be "unmodified". There is a script to do this in the JMRI Users group Files area, or one can work back from the following:
For those who do not wish to use the new version, the instructions for modifying Java are given below. If one wishes to run both, then this is simply a matter of unmodifying or modifying Java using the scripts.
The problem was that the RxTx in the Ubuntu
repositories would not work with JMRI! RXTX 2.1 uses a different structure than
RXTX 2.0; JMRI requires the RXTX 2.0 structure.
The "2.0.7pre2" is known to work well
and that is what is included in the automated script which can currently be downloaded from
Download RXTX-Install
and placed in a spare directory. Unpack it by double-clicking, and then
extracting (select: "Extract") the file.
The script is run by opening a Terminal and giving the command: ./RXTXinstall
The script will do the following:
ln -s librxtxSerial-2.0.7pre2.so librxtxSerial.sodev/ttyS0 and ttyS1./etc/group and adds the user to it.The above description is brief, but the script itself can be opened in a text editor and studied at leisure.
On a fresh install the environment is OK java -version will return something like:
java version "1.6.0_15"

Java(TM) SE Runtime Environment (build 1.6.0_15-b03)

Java HotSpot(TM) Client VM (build 14.1-b02, mixed mode, sharing)
or
java version "1.6.0_0"

OpenJDK Runtime Environment (IcedTea6 1.6.1) (6b16-1.6.1-3ubuntu1)

OpenJDK Client VM (build 14.0-b16, mixed mode, sharing)
However, upgrading Ubuntu may create problems for JMRI releases prior to 2.9.2 as the upgrade may now point at the "wrong" java. In this case simply run the reinstall script.
Currently, the start-up scripts work "out of the box". However, some versions may need altering to get the computer
to "see" a USB port by adding -Djavax.comm.rxtx.SerialPorts=/dev/ttyUSB0 as follows:
java -noverify -Djavax.comm.rxtx.SerialPorts=/dev/ttyUSB0 -Djava.security.policy
Please see the FAQ for more details.
To start JMRI, open a terminal and enter ./DecoderPro or double click the icon.
After a clean install, the JMRI Preferences pane will open. Select your Connection and USB port, click "Save" and restart.
More on this on the JMRI Setup help page.The JMRI Hardware help page lists the various types of layout equipment that JMRI can connect to, and gives links to instruction pages. Go there next to complete your setup.
When PanelPro and DecoderPro are first run, they look
for a hidden directory ".jmri" in the home directory.
If they do not find it they will create one. To see this
hidden directory in the file browser select "View" and then
"Show Hidden Files".
This directory holds the Preferences. If you are
experiencing difficulties with JMRI failing to start up, removing the
relevant Config2.xml file from this directory should fix it.
If you have any problems get back to the JMRI users Groups.io group.
Open a Terminal window and put in the following command exactly:
while : ;do clear;ls -lt /dev|head;i=$((i+1));echo $i;sleep 1;done
Press ENTER and watch the screen as you slowly plug/unplug the USB device, watching what device appears/disappears and record the name.
If nothing appears/disappears your device is not loading a driver.
You will also need to enter the following command exactly:
sudo adduser ${USER} dialout
(This assumes "dialout" is the group shown beside your device in the list above.)
Then logout and back in again so the group membership takes effect.
Next, go to JMRI Preferences -> Connections and the device name you saw earlier should be in the dropdown list once you select a serial connection.
Do not:
- Try to bypass group membership by running as root. That will create further problems.
- Try to change permissions of the serial port you see. They will be lost every time you plug/unplug/logout/reboot.
If you keep having problems, check the /var/lock directory and remove any stale lock files for the device.
In particular this can be a problem if you have ever run JMRI as root.
We recommend you use Ubuntu 8.04 or later with the LocoBuffer-USB. If you are planning to use Ubuntu 7.10 or older and a LocoBuffer-USB from RR-Cirkits, you will need to download the patched ftdi_sio.ko file (right-click on the link and save this file) to replace the one that came with the distribution.
CATS 2.34 (Release2037) is compatible with JMRI 3.3.1 through 3.8. We recommend that you use JMRI release 3.8 with it. Newer releases currently do not support CATS.
We have carried out limited testing on CATS with 2.9.2 and with a modified install script it runs. If you are running CATS, one drops the zip file into the JMRI directory, and unpacks it there. Then copy cradic.gif and put the copy into resources. We recommend to keep TrainStat in a separate directory. Also move CATS out of the JMRI install directory before updating JMRI in the future to prevent it being deleted by the installer.
Details on installing Ubuntu can be found at Ubuntu Downloads
Follow the Path "Download" and read up on the Help page which gives advice on how to download the ISO image and
then create a bootable CD to install Ubuntu.
JMRI Help also has details for installing Xubuntu.
You can find some more specific information on the "JMRI Linux FAQ page".
(Updated Ubuntu install instruction provided by Kai Vehmersalo Feb 2016; information on CATS and Java requirements Dec 2015)