The VSDecoder Manager window provides a consolidated window to manage all the VSDecoders running on a system. Each active VSDecoder appears as a "control panel" within the Manager window, and all of the key controls required are at the user's fingertips.
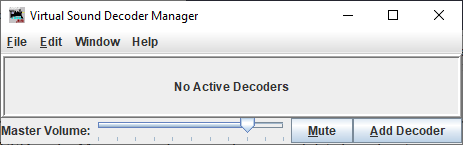
Launch the VSDecoder Manager by selecting "Virtual Sound Decoder -> VSDecoder Manager" from the Tools menu. A simple window will appear, with a blank panel, a master volume/mute control, and an "Add Decoder" button.
To create a new VSDecoder, click "Add Decoder". This will open a Configuration Dialog ("Config Dialog") where you can choose a locomotive and a sound profile. Once you close the Config Dialog, a new Control Panel will be added to the VSDecoder Manager window.
Each time you add a VSDecoder, a new Control Panel will be added to the main window. You can remove Control Panels by clicking the "Delete" button.
Once you have added a Control Panel, the VSDecoder will respond to throttle and function button presses from a throttle assigned to the locomotive's address, or to button presses on the Control Panel.
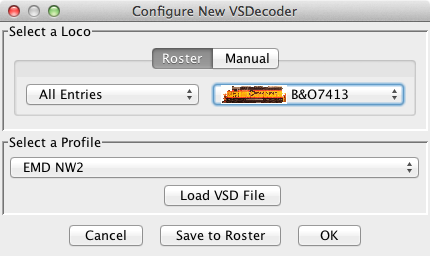
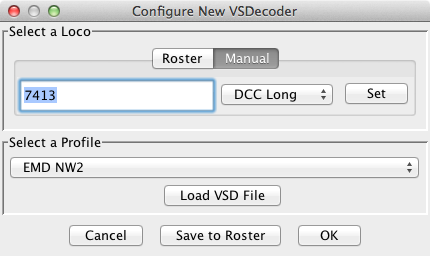
The Configuration Dialog allows you to create a new VSDecoder. Choose a locomotive from the Roster or set an Address manually. Then select a Profile from the Profile Select combo box. To load Profiles, click the "Load VSD File" button or choose File->Load VSD File from the menu bar.
Note: You must have a Locomotive assigned and a Profile selected before the "OK" button is enabled.
You can save a Profile to a Roster Entry so that it is automatically configured when the Roster Entry is selected. To do this:
To manually set a locomotive address:
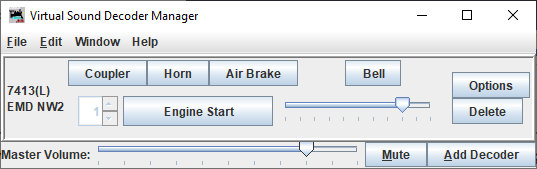
Each VSDecoder gets a Control Panel within the VSDecoder Manager window. The Control Panel is divided into three sections:
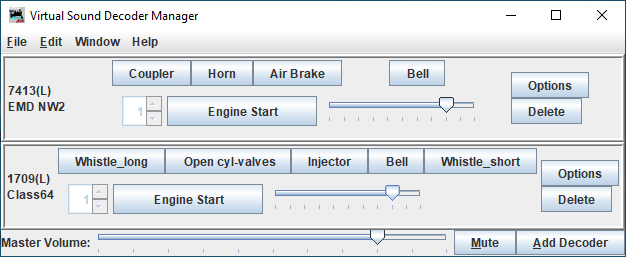
The left section shows the assigned Loco Address and Profile Name. The center section provides buttons for activating sounds and a volume control for these sounds. The right section has buttons for Options or deleting the Control Panel.
Sounds can also be activated by a throttle assigned to the same address as the VSDecoder.
And similar the "Engine Start" button can be activated by a throttle key, if desired.
Note 1: To start the Engine the throttle speed must be 0.
Note 2: Diesel engines normally have a starting-sound. Throttle changes will not be
processed until the starting-sound has finished.
There is a volume control to the right of the "Engine Start" button for each VSDecoder. The changed volume is saved in the Roster Media when a Roster is used.
At the bottom of the window is a master volume slider and mute button. These control the overall sound level for all VSDecoders within the VSDecoder Manager. The changed master volume is saved in the VSDecoder Preferences.
Load the Sound Profiles from a VSD File. Profiles loaded will be available to any currently running or newly launched VSDecoder. This is the same action as the "load VSD File" button on the Config Dialog.
Set preferences for VSDecoder operation. See VSDecoder Preferences for details.