Apache NetBeans makes a great platform for working with JMRI. The JMRI code is set up to work with Apache NetBeans with almost no additional setup.
Apache NetBeans is a very powerful Integrated Development Environment (IDE), which can make working with the JMRI code pretty easy. But it takes a little getting used to, and reading the tutorials will be helpful.
Download and install a Java 11 or newer Java Development Kit (JDK) (It is recommended to use a package manager if possible to ensure security updates can be automatically installed)
Download Apache NetBeans from netbeans.apache.org (It is recommended to use a package manager if possible to ensure security updates can be automatically installed)
Run the Apache NetBeans installer
Apache NetBeans can also be installed as a snap package for Linux.
Apache NetBeans and the OpenJDK 11 JDK can be installed using Homebrew from the terminal:
brew install --cask openjdk@11 netbeans
Note:
Due to different handling of Line Endings characters (LF / CR
LF) between Windows and other systems - namely Unix and OS X (see
Handling Line Ends) - it is of the
utmost importance that all Windows users adopt the following settings for
their development environment. This is absolutely required so that Git can
track individual changes on files that you commit.
If you are using GitHub Desktop to manage your copy of the JMRI code, create Pull Requests etc. then this will take care of properly convert line endings to the correct format. There is no need to change anything within NetBeans.
If instead, you use NetBeans to directly manage your Repository and don’t follow these instructions, you’ll mess up the line endings in the files you commit, which will in turn make their revision history much harder to access. Files in this condition will not be accepted as pull requests.
As a first step, as JMRI has adopted LF as a convention for
Line Endings, it is required to set the core.autocrlf setting
to true (see "Dealing with
line endings" on GitHub Help)
You must install and configure the "Change Line Endings on Save" plugin as follows before using Git via Apache NetBeans.
Choose Tools › Plugins
Click
Select Netbeans Plugin Portal and ensure it is active
Click
Select Change Line Endings on Save
Click
Follow the prompts to complete installation
Restart Apache NetBeans when prompted
Choose

Click
Click the tab
Select Enable adjusting the line endings
Choose Unix (LF) from the popup menu
To be prompted before line endings are adjusted, select Show confirmation dialog before adjusting the line endings
Click .
You can check that the plug-in is properly installed by going to go to Tools
> Plugins > Installed, where you should see the ChangeLineEndingsPlugin in the list.
GitHub provides JMRI’s code repository using the Git tool. For more information on how JMRI uses Git, see the JMRI Help on Getting the code via Git and Git FAQ.
Once set up, Apache NetBeans provides built-in support for using Git.
For more information on Git and Apache NetBeans, see the NetBeans Git help page
In Apache NetBeans, under the "Team" menu, select Git, then Clone Repository. Enter the https://github.com/JMRI/JMRI.git repository URL from the JMRI GitHub page on the Apache NetBeans form under "Repository URL". We recommend that you also enter your GitHub user name and password on the form, so we can attribute your contributions to you later. Click "Next". Make sure that the "master*" box is checked to pull down the main version of the code. Click "Next", and then click "Finish".
It’ll take a long time to pull down a copy of the code (note the progress bar in the lower right), but then you’re good to go.
When using Git, the "commit" operation is local to your computer. It doesn’t make any changes to the main JMRI repository.
You’re encouraged to commit often, so that your changes are safely stored away from your working directory. Having each small change separately recorded can be incredibly helpful later on if you have to track down where a problem was introduced.
From time to time, you should update your local copy of the code to match the current "HEAD" of the main JMRI Git repository contents. The basic process is to pull the most recent copies from the main JMRI repository, doing any merging that’s needed if you’ve made conflicting changes, and then pushing that up to your own GitHub repository.
To do this, use the Apache NetBeans [Team] → [Remote] → [Pull from Upstream] menu choice. Tell Apache NetBeans to pull from the "github" remote you defined above.
You may also update a single file or the contents of a folder, by right-clicking on an item in the "Files" window, then selecting [Git] → [Remote] → [Pull from Upstream].
A "Pull Request" (PR) is an easy way to gather all your changes, even if they span multiple files, into something that you can then submit for inclusion in the main JMRI repository.
First, you need to set up a GitHub account and your own repository.
Get a GitHub account and login
Tell GitHub to "fork" JMRI’s repository into one of your own. There’s a good help page, but basically you go to the JMRI repository page and click the "fork" button in the upper right.
This gives you your own repository, which you can then work with freely.
Next, push the changes up to your repository. (Anybody can push to their own repository, but most people don’t have permission to directly modify the main JMRI repository; that’s why the pull request is needed) To do this:
Use the Apache NetBeans [Team] > [Remote] > [Push...] menu choice. (If you try to use the "Push to Upstream" choice, it will try to write back to the main repository, and will fail.)
Click on Specify Git Repository, and enter the URL for your own repository,
e.g.
https://github.com/<yourname>/JMRI.git
Then click next.
Apache NetBeans will check with the repository, and show an indication of branches to push e.g. "master → master" Check the appropriate box to for the branch you’ve been working on.
Click Next and Finish. Netbeans will do the actual push to your repository.
You can repeat this as many times as you’d like as you’re working on your changes. Each time, the most recent changes are pushed up and made available.
Finally, when your change is ready to submit, go to the GitHub website to fill out and submit a pull request.
Eventually, somebody will look at the pull request and decide whether to merge it in. Sometimes they’ll ask for additional changes. In that case, you can update the pull request by just pushing new changes to your repository, where they’ll automatically be picked up.
Tip:
Ensure your computer is connected to the internet the first
time you build, test, or run JMRI after checking out a new copy of JMRI from
GitHub to allow any potentially missing external dependencies or build tools to
be automatically downloaded.
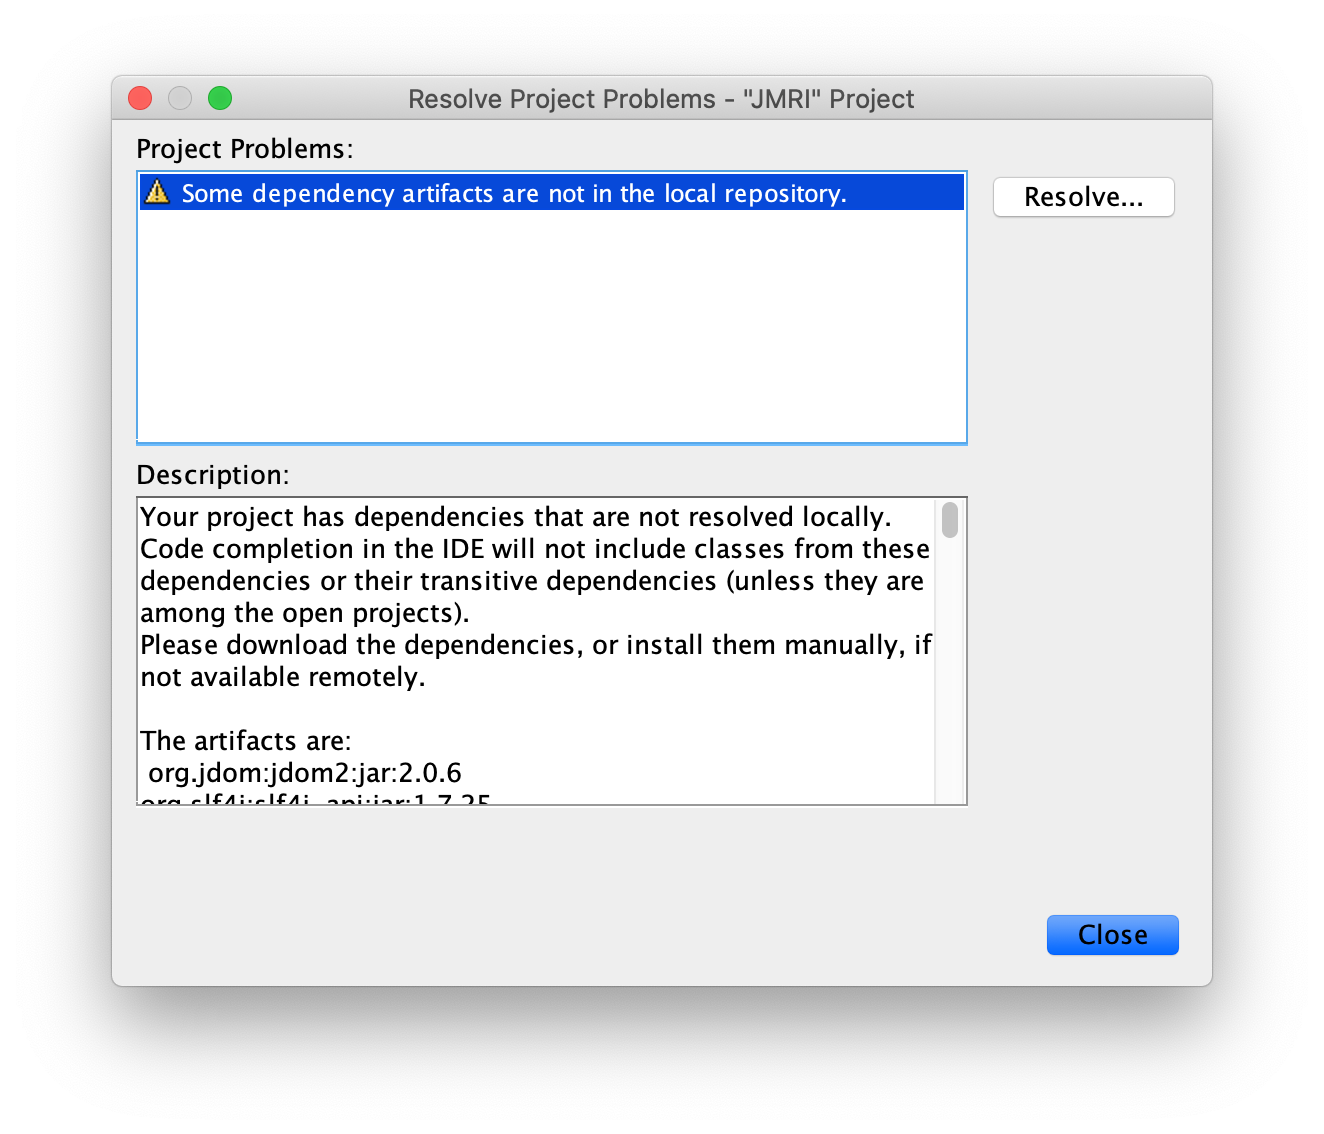
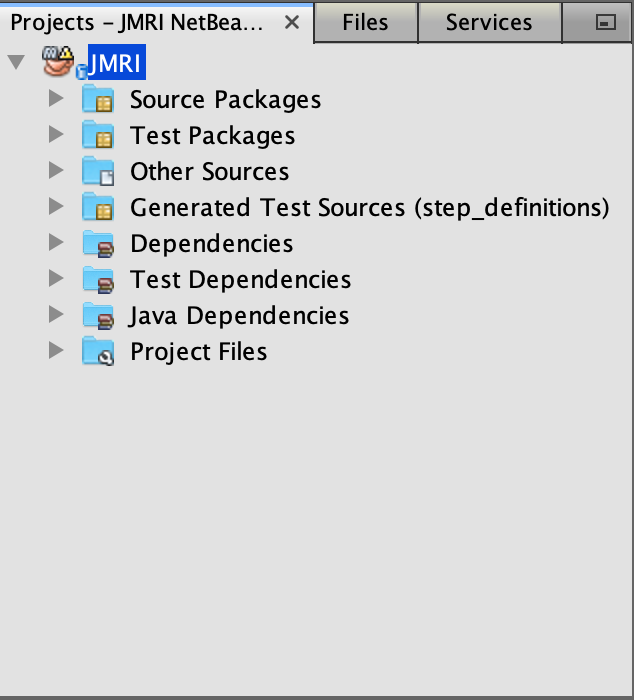 The first time you open the JMRI project
in Apache NetBeans, a warning icon will be shown on the project. This warning
indicates Apache NetBeans has a problem with the project. Usually the first time
warning indicates that build artifacts are missing.
The first time you open the JMRI project
in Apache NetBeans, a warning icon will be shown on the project. This warning
indicates Apache NetBeans has a problem with the project. Usually the first time
warning indicates that build artifacts are missing.
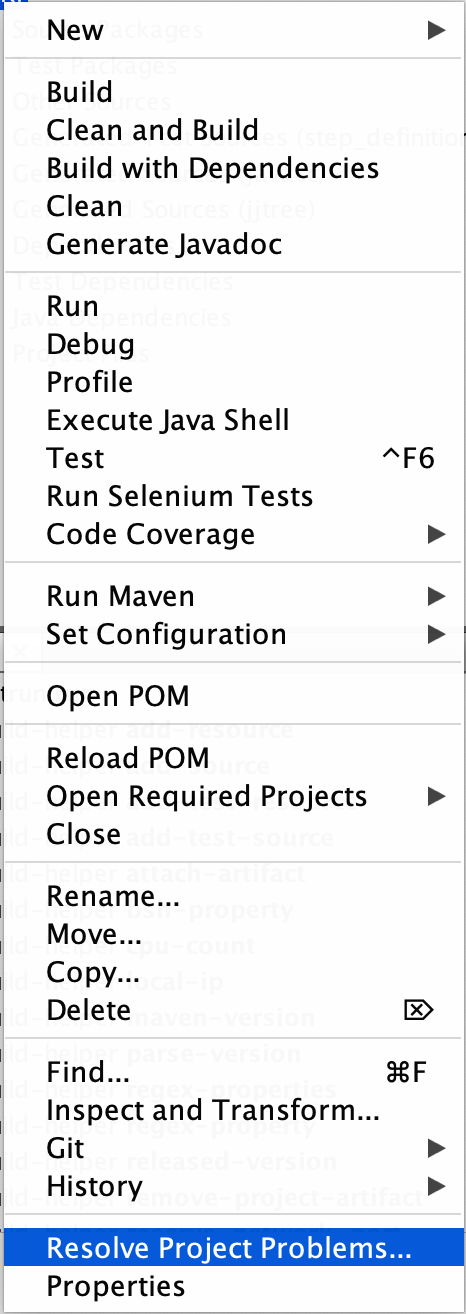
To resolve this problem:
Select the JMRI project
Choose (the shortcut menu is usually opened by right-clicking on the project) Show example...
Click once the warning icon changes to an OK icon
To build JMRI, choose or .
Tip:
To build only the JMRI Java source code, run the maven lifecycle phase compile.
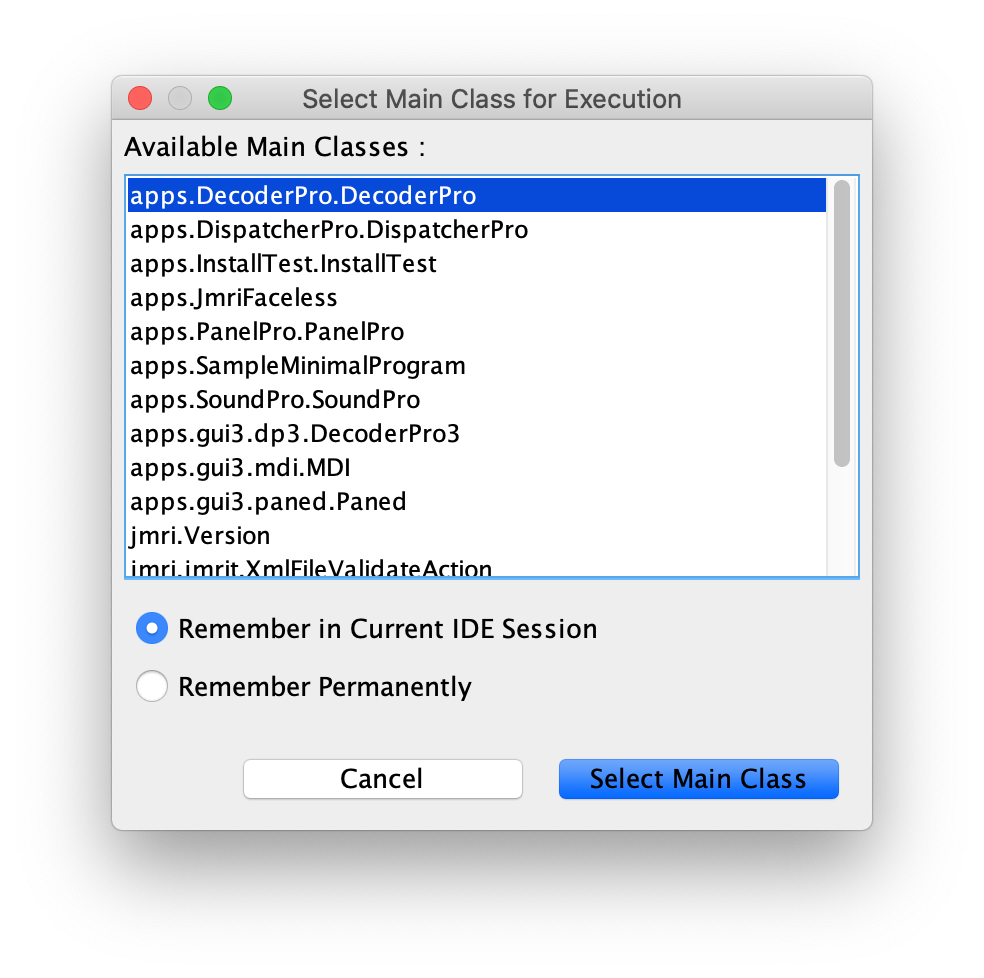 To run a JMRI
application, choose or click the Run icon in the tool
bar. You will be prompted for the JMRI main class to run the first time you run the
project.
To run a JMRI
application, choose or click the Run icon in the tool
bar. You will be prompted for the JMRI main class to run the first time you run the
project.
The JMRI applications are launched from the main classes:
| DecoderPro |
|
| PanelPro |
|
| SoundPro |
|
Tip:
A new JMRI checkout should build cleanly. If not, please share your configuration on
jmri-developers groups.io or on GitHub create an
issue applying for assistance.
To debug a JMRI application, choose or click the Debug icon in the tool bar. You will be prompted for the JMRI main class to debug the first time you run the project.
To profile a JMRI application, choose or click the Profile icon in the tool bar. You will be prompted for the JMRI main class to profile the first time you run the project.
Most of the code in a normal JMRI installation lives in a file called jmri.jar. If you want to replace this with your updated version, you need to create a new jmri.jar file from your modified code.
To do this, ctrl-click (or right-click) on the name of the "JMRI" project in the "Projects" window. This will open a pop-up menu, on which you’ll find "Make Jar File". Select that, and a new jmri.jar file will be produced in the project’s main directory.
Alternately, from the "Files" window, right-click on the build.xml file, and select "Run Target", then "jar".
It is possible for Apache NetBeans users to create a release package for use on the Windows platform. This requires installation of the Nullsoft Scriptable Install System (NSIS), which can be downloaded from the NSIS project website on SourceForge.
Comments in LaunchJMRI.nsi suggest that it is also necessary to install ( extract ) the
"Large strings" build available from
NSIS Special Builds.
Once NSIS is installed on the computer, it is necessary to create a file called
local.properties in the same directory as JMRI's build.xml file. This file is
specifically not checked in via GitHub, so that your machine-specific tool
installation paths are not checked in to GitHub. Create the file, and add a
variable definition with the correct path to the directory which includes the NSIS
executable, such as: nsis.home=C:/Program Files (x86)/NSIS/ or nsis.home=/opt/nsis/nsis-2.46/ Note: Make sure the trailing / is present. With the NSIS package installed to your computer, and build.xml properly modified,
the Windows package may be created by running the "package-windows" ant target in
build.xml. Apache NetBeans has nice tools for working with XML files, including editing and
validating them. JMRI uses XInclude to include XML fragments in other XML files via
URLs to the JMRI website. JMRI programs convert
these at run time to local file references; however Apache NetBeans must be
configured to do this if you want to edit JMRI XML files while offline. To configure Apache NetBeans to allow offline XML editing: Choose Click Select the Catalog Type Click Navigate to Click Click Click
Note: The SpotBugs tool is a static code analysis tool which examines JAVA source code
for common coding issues. To run the SpotBugs tool on JMRI code, execute the maven goal
spotbugs:check which is defined in pom.xml. Within Apache NetBeans this can
be accomplished by clicking JMRI in the Projects pane and then clicking
"spotbugs check" in the Navigator pane. When SpotBugs
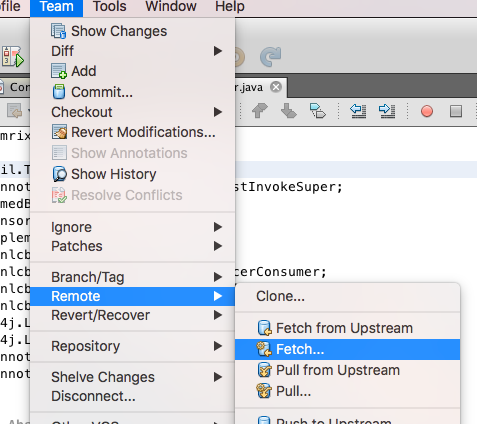
completes, the Apache NetBeans Output window will show the SpotBugs results. The process for building from a branch (i.e. the one where someone has put a
change) is a bit different from the standard instructions. (The following is NetBeans
8.2, but it doesn’t vary with versions much) Under "Team" → "Remote" select "Fetch" (not Fetch from Upstream) Fill out the form to specify the correct user’s repository (After the 1st time
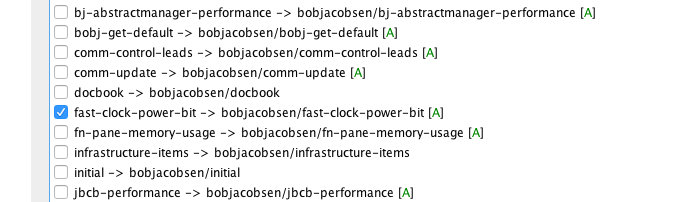
you do this, you’ll be able to select by name in the top choice) On the next screen to select a branch, you can either select all of them
(there’s a button) or find and select just the name of the branch that holds the
desired change: Click "Finish" At this point, you’ve pulled my changes onto your local machine, but you’re not
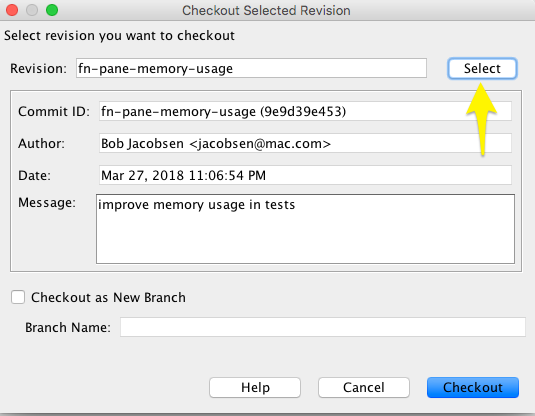
using them yet. To have those files appear locally for Apache NetBeans to build: Back on the main menu, select "Team" → "Checkout" → "Checkout Revision...". On
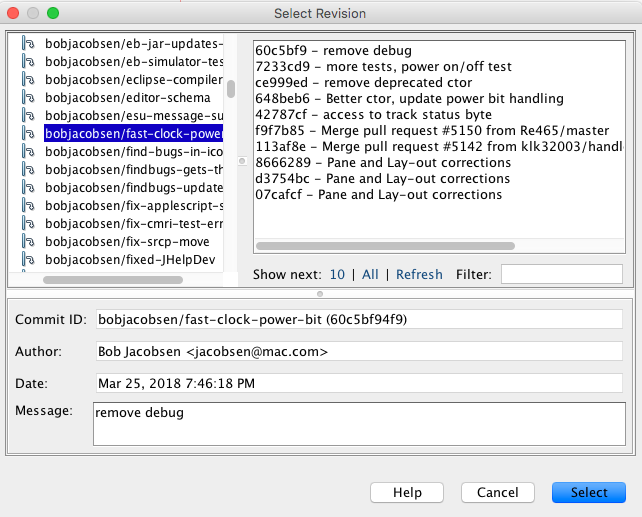
the window you get, click "Select": In the upper left, find the imported branch you want, which in the example is
"bobjacobsen/ast-clock-power-bit". Either click to highlight (show) and then
click "Select", or just double-click on it. (Don’t worry about the upper right or
the lower box, they’ll be automatically set right) Back on the "Checkout Revision..." window, make sure the "Checkout as New
Branch" is not checked, and then click
"Checkout"
Now you’ve got a copy of my changes as your checked-out source. You should do a
"Clean and Build Project" to make sure that you get a consistent compilation, and
then you should be able to run it.
When you want to get back to the standard JMRI
version, from the main repository, you need to check out the Using Apache NetBeans XML tools
OASIS Catalog Resolver/path-to-your-JMRI-project/xml/catalog.xml
the XML catalog location is not project specific, so if you
are working on multiple JMRI projects, whichever project you add the catalog from
will be used, not the current project.Running SpotBugs
Loading a Specific Branch from GitHub

master
branch. The process is similar, and simpler. Choose ,
type master in the Checkout Selected Revision box, and
click .